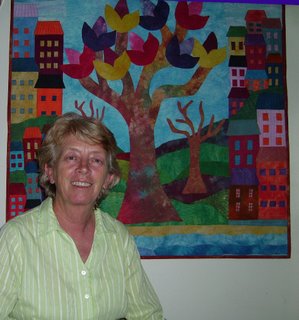
Happy Birthday Vicki
I belong to a group in my area and each year at Christmas break up we pick a name out of the hat and thats the person we make a birthday gift for the following year. My gift was late this year because I put the piece of paper away and forgot about it until someone else had a birthday and got a present. Jogged my memory and I thought my persons birthday was coming up only to find it had passed.
I did better than the last birthday I had to make for in another group. We celebrate all the birthdays in this group on our weekend away, I lost the piece of paper with the name on it and completely forgot who I had to make for. I made a present but was a little (maybe a lot) embarassed when I told everyone I would have to go last because I didn't know who I had. Fortunately my friends saw the funny side of it. But they haven't forgotten.
25 April, 2006
From my garden
This is a potted plant that was given to me by a friend, this is the second stalk of flowers its had this year and they are truley stunning to look at. Its a Lily but I can't remember the full name.
Re reading this post I remembered the name - its a 'Eucharist Lily'. Spelling may be wrong.
This is a potted plant that was given to me by a friend, this is the second stalk of flowers its had this year and they are truley stunning to look at. Its a Lily but I can't remember the full name.
Re reading this post I remembered the name - its a 'Eucharist Lily'. Spelling may be wrong.
24 April, 2006
21 April, 2006
Little Flowers
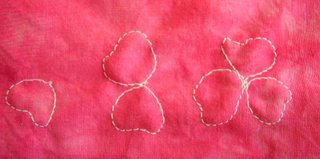
Some people have asked how I do the little flowers shown in a previous entry so I thought I'd show you.
Firstly I folded a piece of fabric in half so I had 2 layers to sew on.
Put the fabric in the machine and pull up the bobbin thread. The 3 petals are stitched in one step but I've done them 1, 2, and 3, so you can see the positioning.
Hold the fabric taught while stitching. Try to leave a little space between the petals, stitching just beside the previous petal and always make sure the last petal has enough room to fit in, then when you cut them out they will be seperate petals on one small flower.
I don't draw the flowers first so they all look a little different.
I use a cream thread to do the outlines and then, to attach them to the quilt, I use a coloured thread to do a centre and veins on the leaves. See the previouse entry.
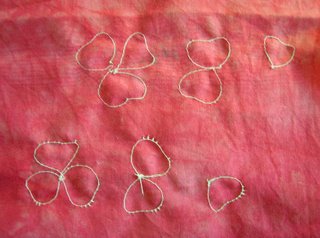
The back of the work
Good idea to check the bobbin tension before you start, notice the lower flowers, the first ones I did I had not checked the tension. I could have kept that hidden but I make these mistakes on purpose (thats what I'm telling you), how else could I show people what not to do?
Try some flowers and send me a photo.
Playing with Misty white Fuse
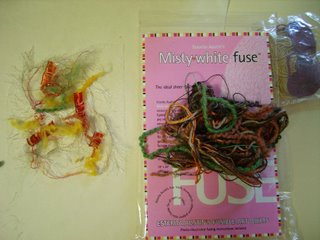
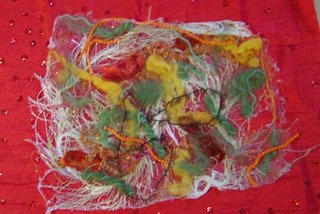
Had fun playing with this yesterday. Carmel put a piece of Misty Fuse on baking paper, then scattered pieces of thread on it. Then folded the baking paper over to cover the piece and ironed it. When cool, peeled off the paper then we sat it on variouse fabrics to see how it looked. Very happy with it and its very soft to the touch. Sewing over it next to see how it sews.
I ironed the Misty fuse to some pieces of fabric, again putting the fuse on the baking paper, placing the fabric on top and covering it with paper then ironing. It is soft to the touch and cuts well. I free hand cut some shapes and ironed them to squares.
May make up a few more pieces to go with this before I layer it and do some stitching. So far I'm very happy with how it works and I dont have to peel off paper and dispose of it.
Carmels Visit
My dear friend Carmel spent the day with me yesterday, and what a lovely day we had. Looking through magazines and books and playing with a new product. Usually our days are a frenzy of sewing doing but yesterday we had fun just talking and comparing pieces in books etc. With a little play time.
Carmel brought along this challenge she's doing to show me. It is all in pieces, and she said she wasn't feeling too happy with it and wanted to show it to me.
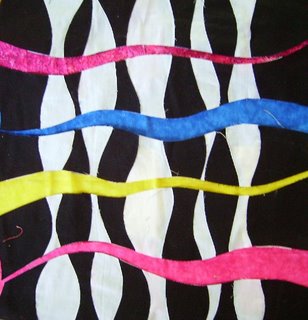
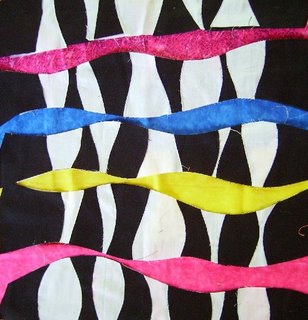
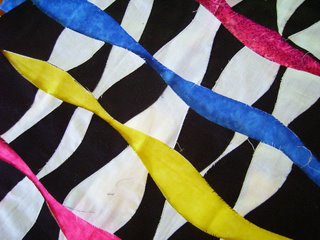
We laid it out on my table, the black and white pieces are sewn together then cut in strips with wavy edges. She put the coloured fabrics down and positioned the black and white strips over them and I thought it was brilliant.
I got out the digital camera and took a photo, then we re arranged the pieces and took another photo, then I took a photo on an angle. I think she could make all 3 pieces and have fun making them all.
Once she saw the photos she too thought it looked good, Sometimes it helps to see something in a different perspective and simply using the digital camera and looking at the picture helps you see something you couldn't see before.
19 April, 2006
Julieanne's Quilt
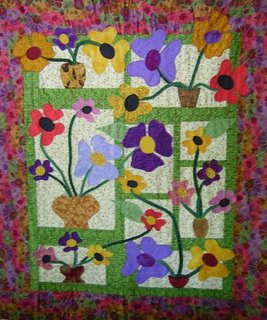
I'm about to start quilting this quilt for Julieanne. It was made from one of my patterns and thankfully she only found one mistake while she was making it.
The small photo is my quilt done in my hand dyed fabrics.
I was anxious to see how the quilt would look in commercial fabrics and I like how this has turned out.
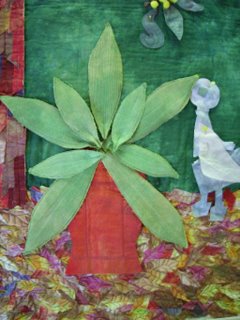
This is a small section of a quilt I'm teaching. Inspiration comes from your garden and so far this one is coming along nicely. I really like the effect Ann has on the leaves in this pot plant. Her leaf litter looks so scumption you want to dive into it.
14 April, 2006
Easter Bunny
In the spirit of Easter and to entertain the ladies Allyson found this great Easter Bunny Hat to wear. Some people can wear hats regardless of the type, I'm not one of them.
Prairie Points
Jenny spent some time making prairie points for the border of her quilt, could there be a hat in the making?
In the spirit of Easter and to entertain the ladies Allyson found this great Easter Bunny Hat to wear. Some people can wear hats regardless of the type, I'm not one of them.
Prairie Points
Jenny spent some time making prairie points for the border of her quilt, could there be a hat in the making?
Subscribe to:
Posts (Atom)